
Hey! If you're new around here, welcome. Sign up for my newsletter to stay up to date with all that is published here!
Microgreens have been a trending health food in recent years, but I'm just now getting into them. Gardener's Supply Co. defines the term as "a variety of immature greens harvested less than a month after germination." Uh, okay.
The problem (in my mind) with the vague term "microgreens" is that it basically coats any type of veggie and herb sprouts, when you look at what is sold under that name. Anything from baby broccoli, cauliflower, chia, and buckwheat can be included in this broad range. I've purchased some live microgreens from my local farmer's market and got a jumbled mix of something small and green that I threw in a few smoothies. I honestly couldn't tell you which baby greens I'd bought.
Being someone with a "questioner" personality, this bothers me.
So, it wasn't until an episode of the Joe Rogan Experience podcast a few months back that I was finally convinced to try a specific microgreen: broccoli sprouts. This was episode #901 (how does he do so many of these??) with Dr. Rhonda Patrick, and the two of them discussed so many dang health things that my IQ went up by 10 just by getting through the whole thing. But I digress.
The thing I really latched onto was the topic of sprouting your own microgreens. Dr. Patrick was adamant that including broccoli sprouts in her daily smoothies have changed the way she feels each day. She couldn't really put a name to this new feeling, just that it was better. She attributed it to a unique compound only found in excess naturally in broccoli sprouts: sulforaphane. While there are amounts of this in other cruciferous veggies, including full-grown broccoli, the concentrations are much higher in the sprouts specifically. The only other way you can even come close to the amount of sulforaphane in broccoli sprouts is by supplementing. Aaaand the supplements at this time aren't super trustworthy.
If you want more detail on the health benefits of broccoli sprouts, check out my blog post on the topic.
ANYWAY, this super-long intro is all getting us to this: I now sprout and harvest my own broccoli to add to daily smoothies and/or salads for a fraction of the cost it would be for me to purchase some at the farmer's market each week. Don't get me wrong, I love me some farmers market finds. But I also like doing stuff myself. And this is such an easy DIY!
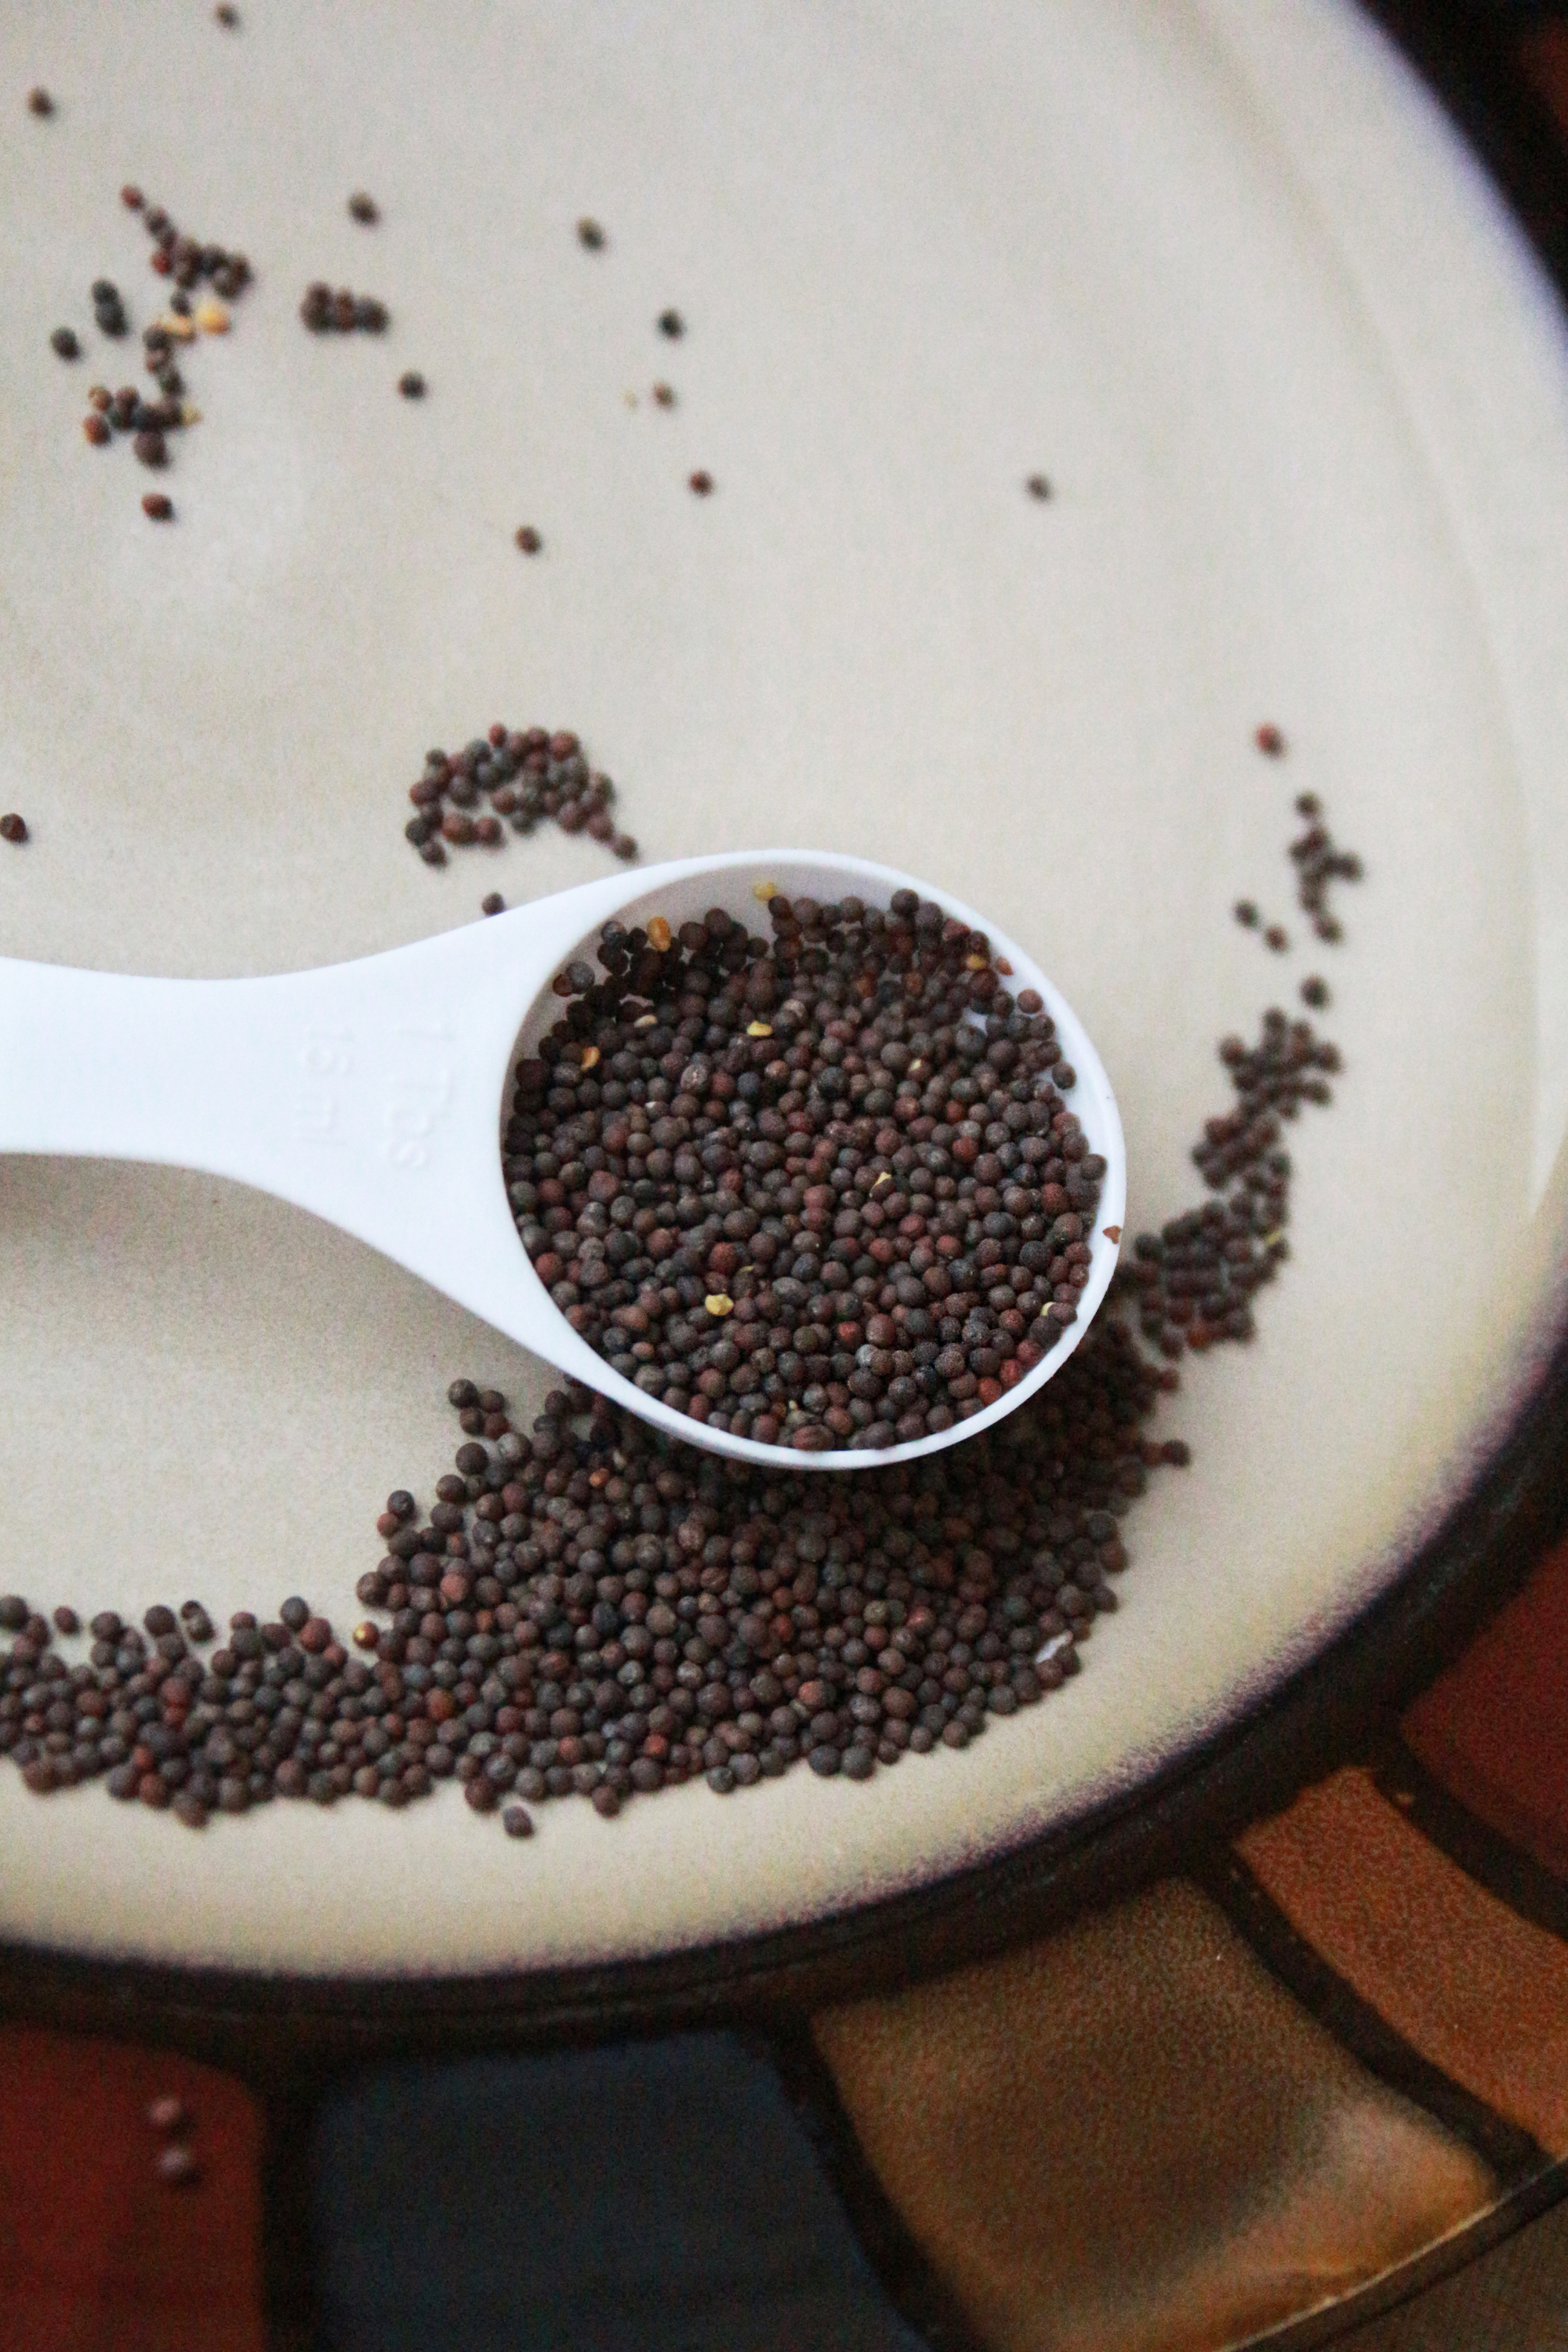
Step one: Get broccoli sprouting seeds. I got my organic package on Amazon for like $24. Sounds dumb for seeds, but it's going to last you a ton of time. That price sounds low very fast when you see that buying microgreens at the farmer's market is about $5 for a couple of servings.
Step two: Get a large-mouth Mason jar and a lid with holes in it. Mason jars are cheap and I got my pre-made lid from Amazon as well. You can also try stabbing holes in the lid that comes with the mason jar, but it's hard to keep them small enough so that the seeds don't strain through.

Step three: Soak 2 Tbsp of the seeds for 8 hours. Your seeds that you purchase should have this noted on the bag, too, as soaking times vary between types of microgreens... another reason to avoid the ambiguity! That also means that this soaking time needs be be somewhat-stuck to.
Your seed package may also claim you need a specific amount of water per 2 Tbsp, but I don't measure mine. To that end: they'll be fine. I usually just soak them right in the jar they will later be sprouted in. Just throw the top with the holes on and it's covered!
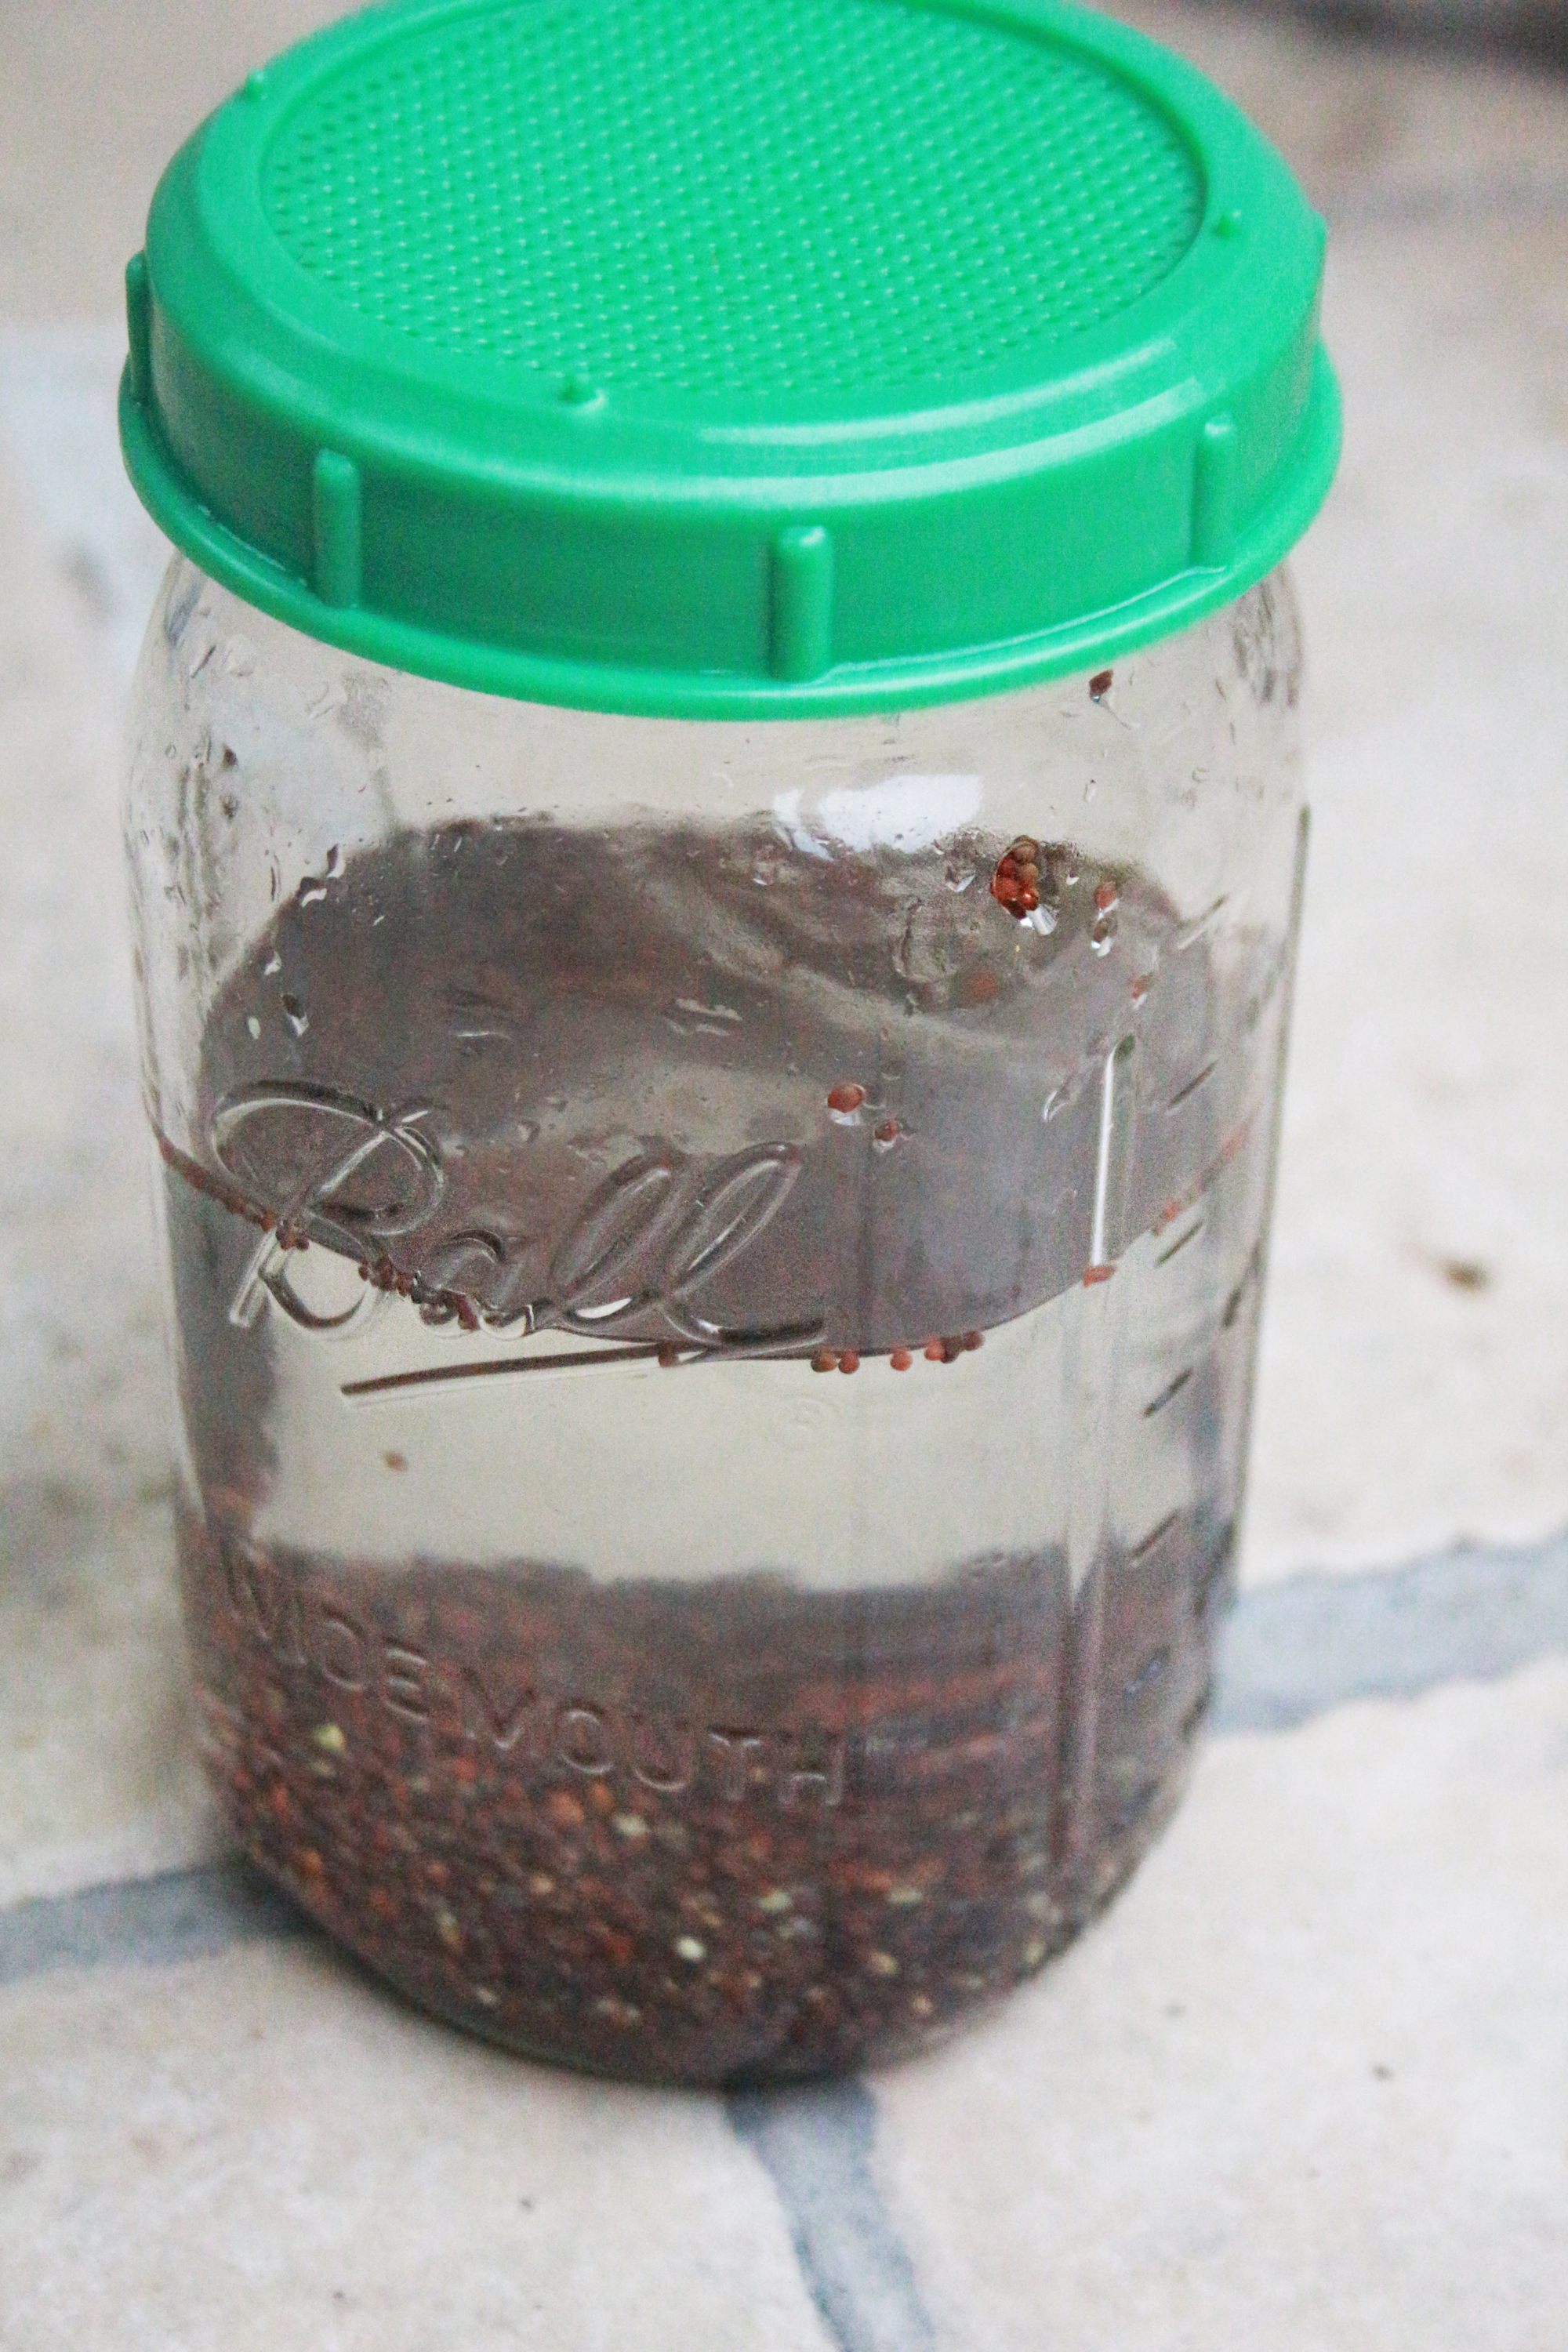
Step four: Rinse off the soaked seeds as you choose, either in a fine strainer that doesn't lose them or in the jar you're already using. You guessed it: I still only use my jar here. I don't own a fine strainer and there's no point in using more equipment than you need to! I'll usually just fill the jar with fresh water, twist the cap back on, and shake up the seeds as the water comes out. Do this a couple of times and they're effectively rinsed.
Step five: Drain the jar as much as possible of water and place it near a window, propped to drain any excess water through the lid's holes. This draining is necessary because sprouts are so prone to mold. You want to rinse the seeds about every 8 hours as they sprout. This looks just like when you rinsed them after the soak: fill the jar with clean water, and shake it out. Don't worry about "hurting" the tiny plants - they'll be just fine with some shaking! ;)

Repeat step five: And here is where the growth begins! Your seeds will be popping out green shoots by the end of the first prop-up day and between days 3-5, your jar will be full. Once you see significant shoots coming out of the seed pods, it's really up to the size of the jar and how long you want to keep them growing.
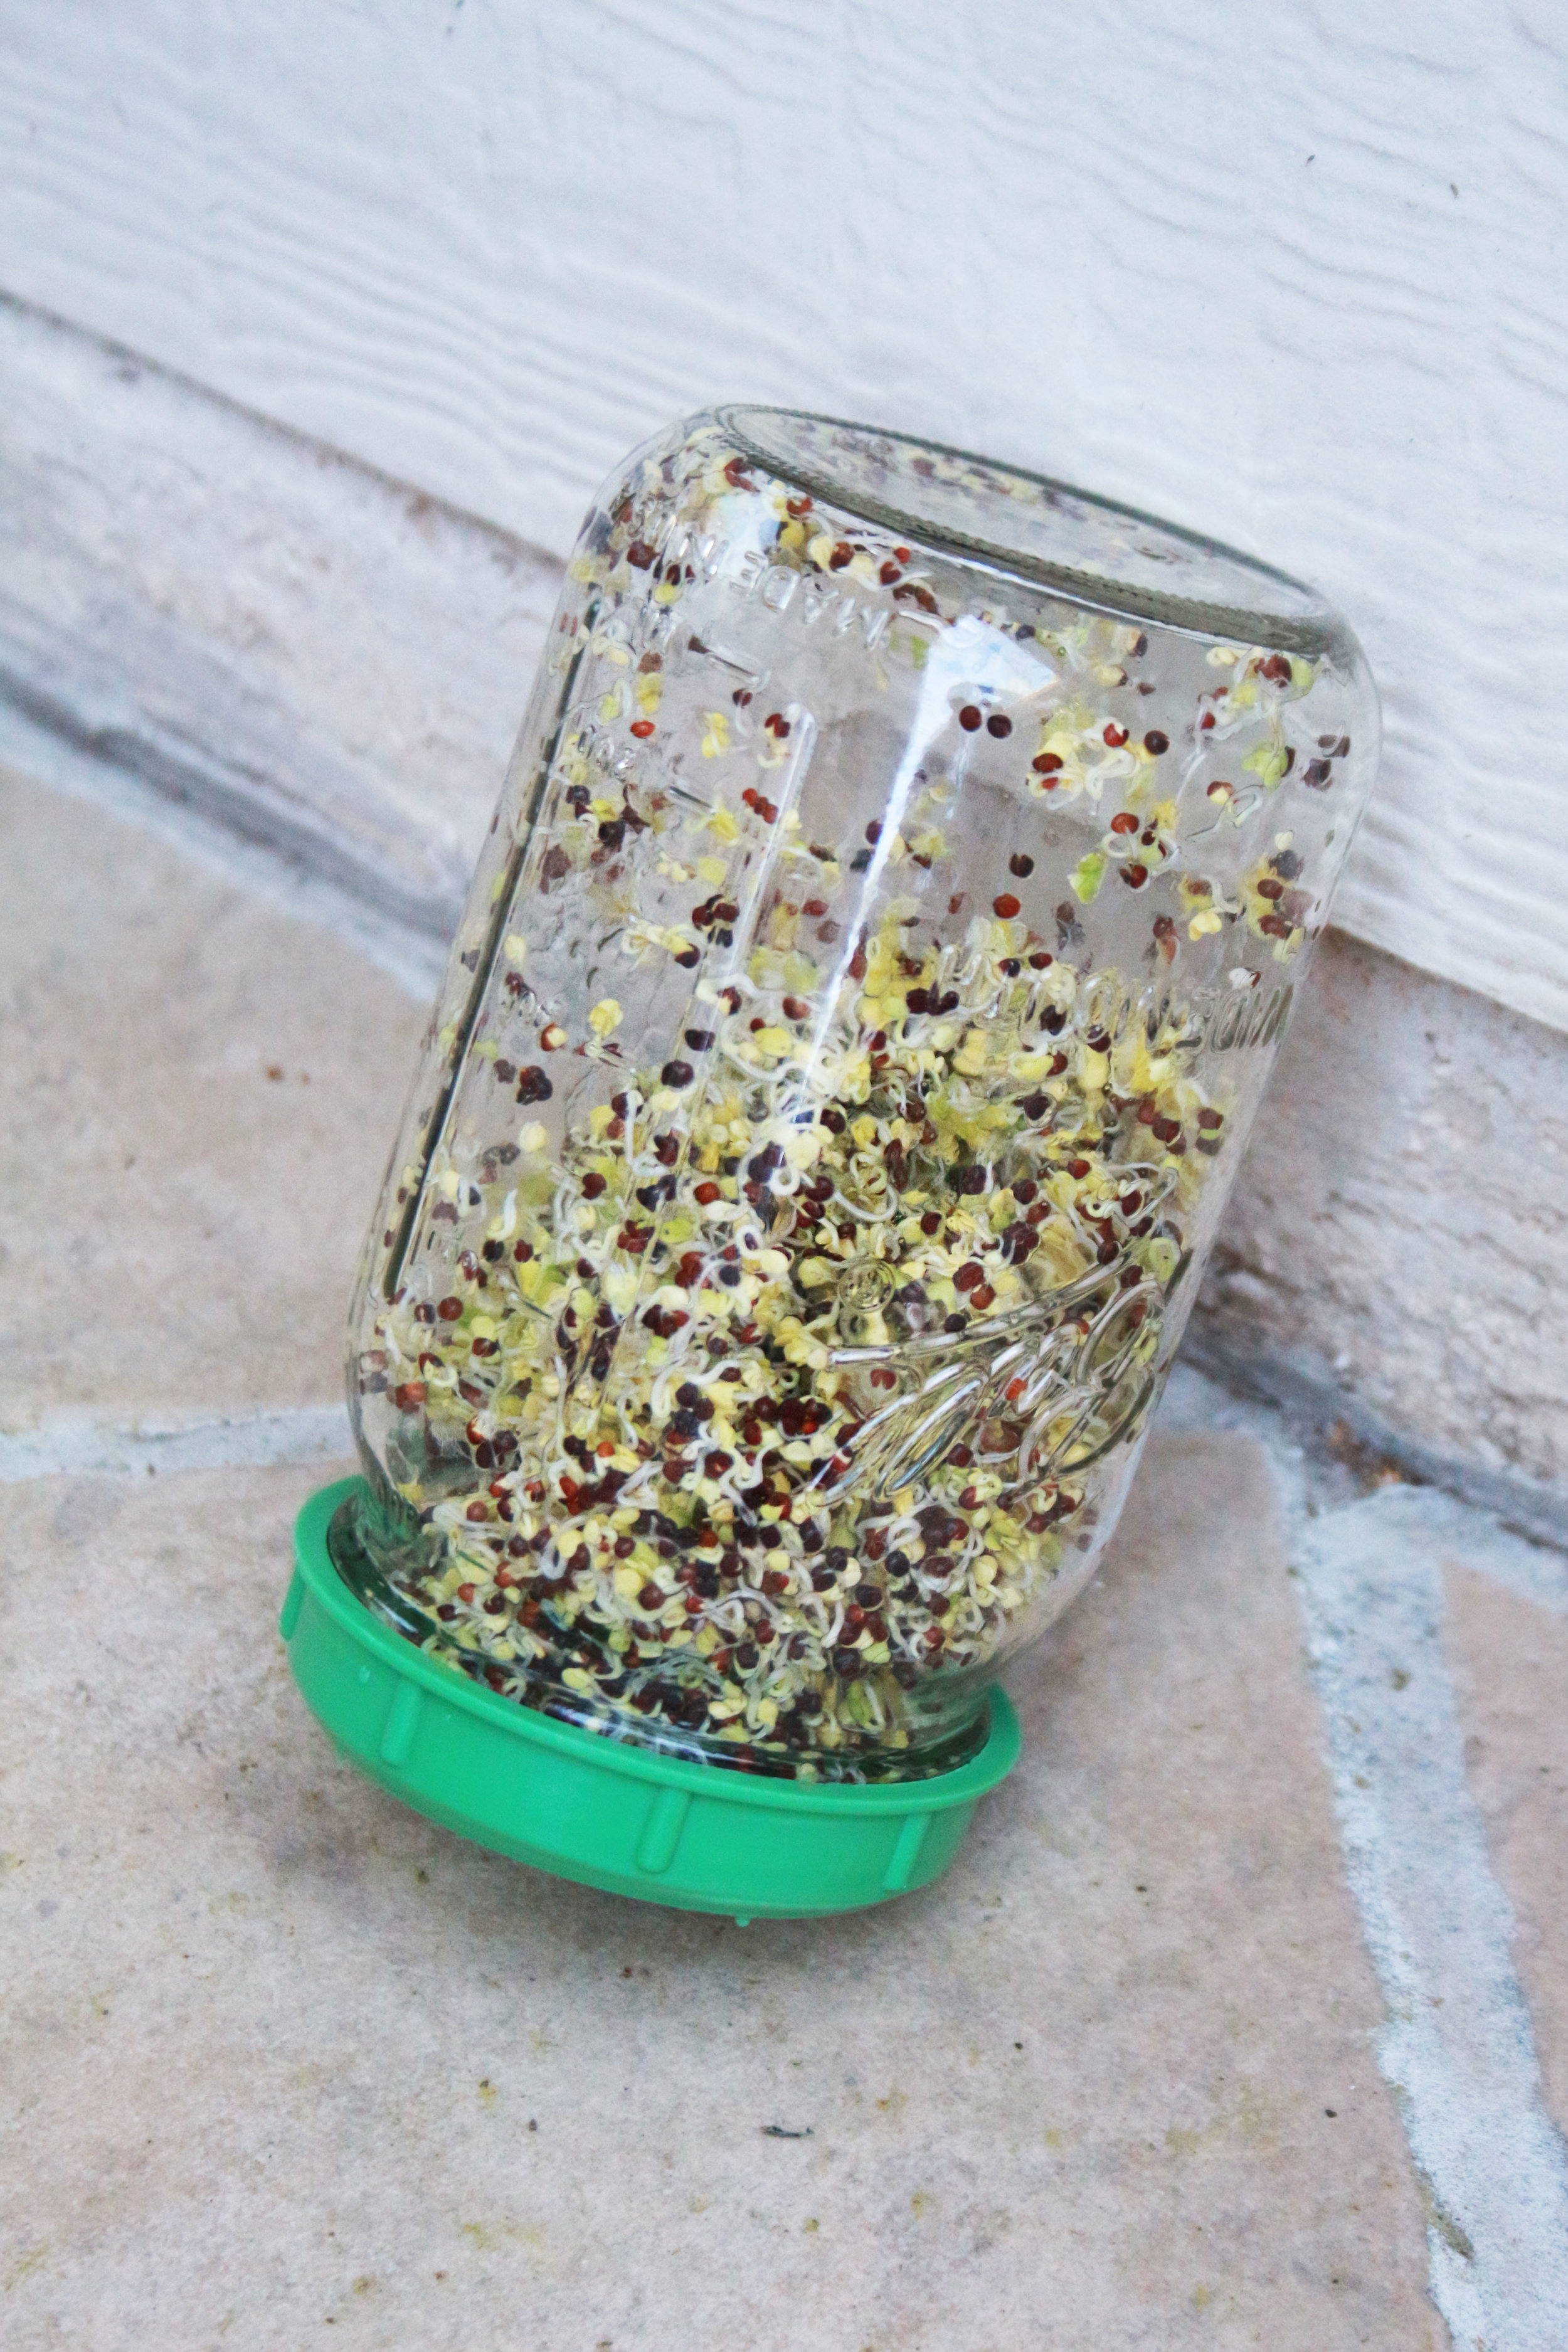
This batch for the photos was after about 5 days of sprouting - it was chock-full and the sprouts didn't have much wiggle room, even when I filled the cracks with water to shake & rinse them!

Step six: Remove the seeds and sprouts into a large bowl and cover with water. Here, you can go through the tangled sprouts with your fingers and unwind them a bit while shaking the seed pods off.

Step seven: Most of the seed pods will float to the top or sink to the bottom of the bowl, so I just use the lid with the holes from the mason jar to skim the seed pods off the top of the water. Then, I pull the sprouts out from the middle and use the same lid to snag the last few sprouts floating around. If you have a few seed pods in your sprouts, they're not going to hurt you; you won't even notice them if you're blending the sprouts into a smoothie!

Step eight-ish: Once it's all said and done, you're going to have a ridiculous amount of sprouts from only 2 Tbsp of seeds. Allow them to sit out and dry on a towel for a while. Then, I usually split my batch in half, putting part in the fridge in a Tupperware container and the other half in a Ziploc freezer bag with as much air squeezed out as possible. The fridge batch lasts 2-3 weeks and the freezer batch lasts just as long or a little more, as the sulforaphane in frozen sprouts somehow increases because of the cold and therefore their flavor is even stronger.
Oh, and on the money-saving aspect of this venture: you just saved a minumum of $5 per week for 6 weeks. That's $30. How much did you spend on starting this? Oh, right. About $30. It's paid for itself in one batch and your seeds are going to last a scary amount of time. Yeah, sounds good to me!
So go ahead, getcha some of this stuff and start adding more broccoli sprouts sulforaphane to your diet! If nothing else, they're an awesome way to spruce up a salad. :)